Showing posts with label Brushes. Show all posts

Thursday, July 20, 2017

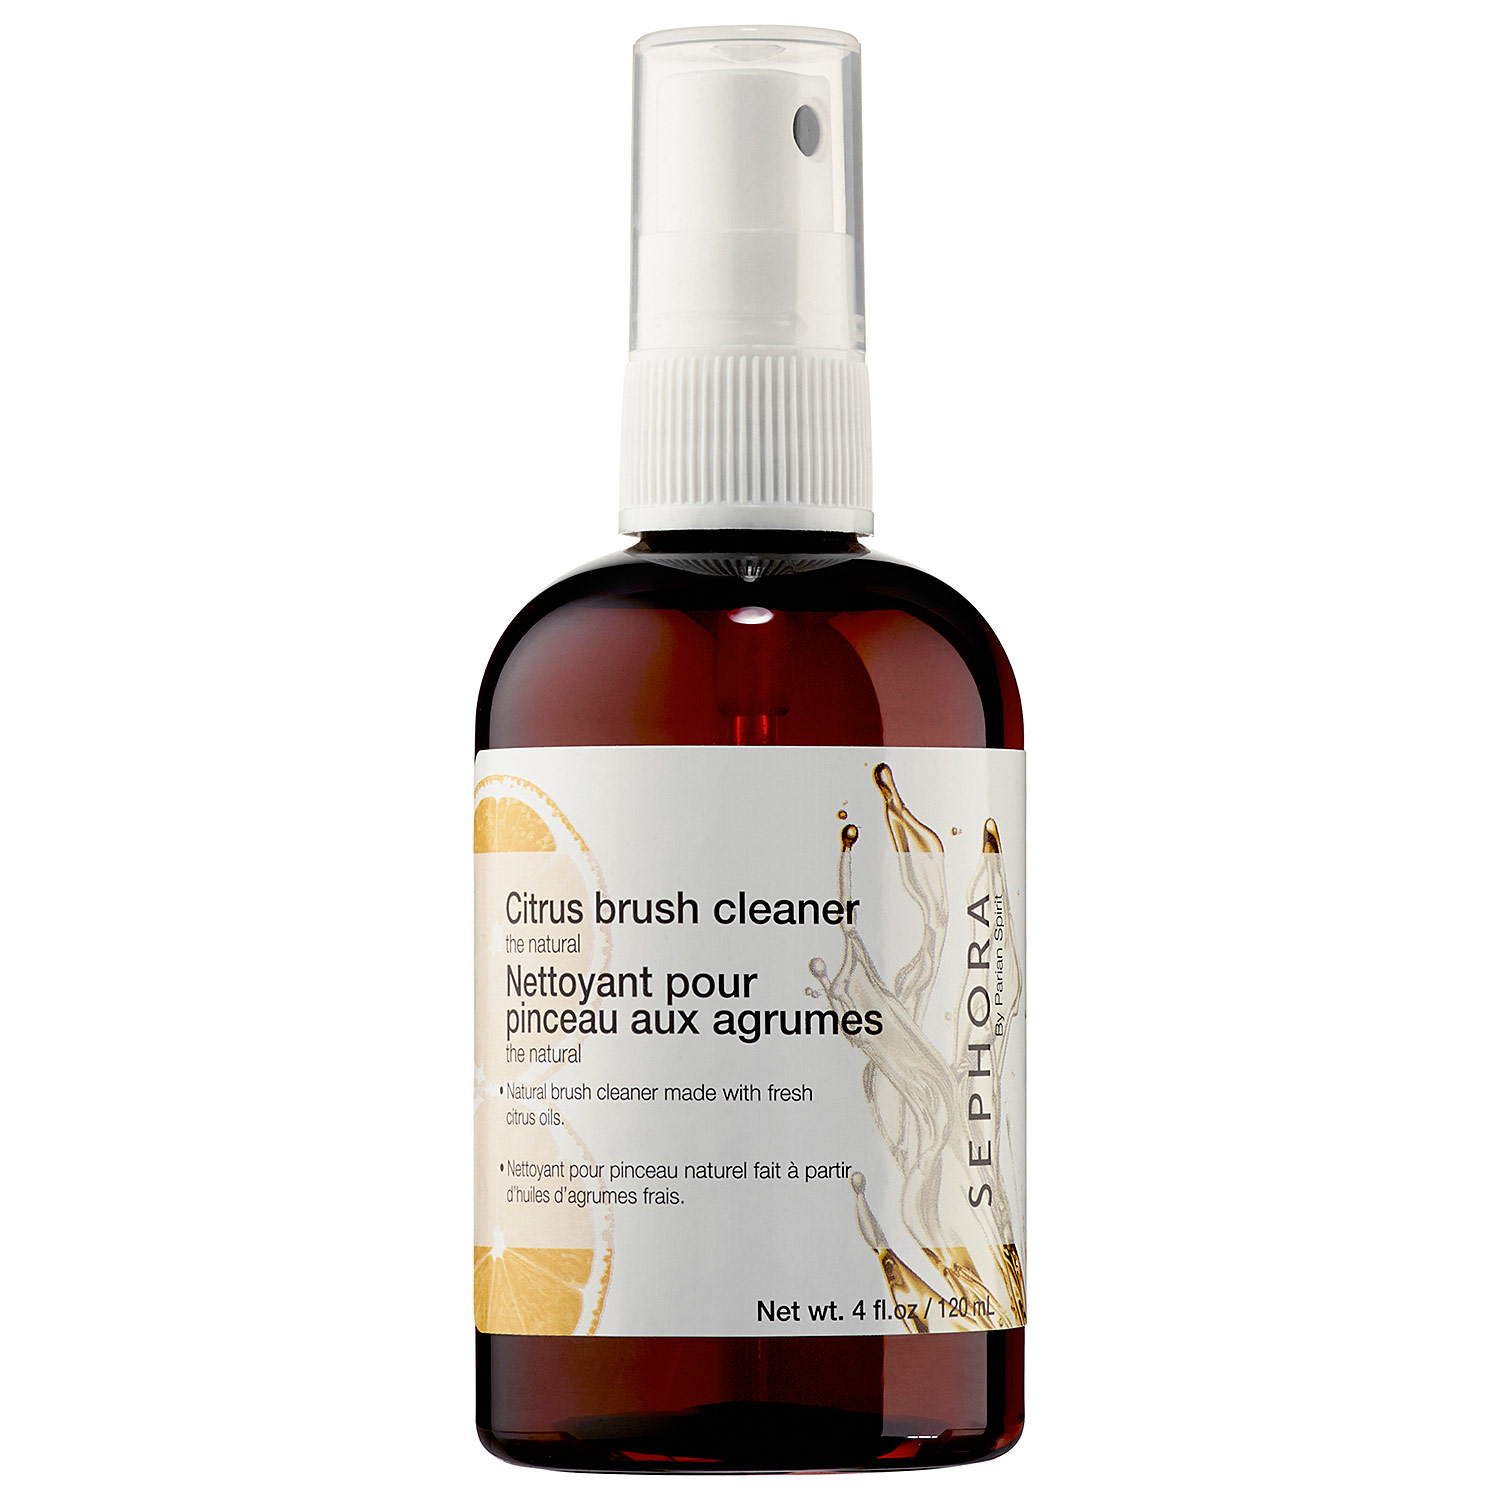
Sephora Collection Citrus Brush Cleaner | Review + Demo

Retails for $11.50 at Sephora
4.0 OZ
Paraben Free
Claims to clean & condition dirty makeup brushes without soap or water.
Can be found here.


Hey Ya'll!
So I decided to give this a try after an Ulta MUA told me she swears by the Parian Secrets formula.
The Sephora Collection brush cleaner is actually a collab with Parian Secrets and is the exact same formula just packaged differently.
You can find the original Parian Secrets cleaner online in various sizes for more reasonable prices, but I opted for Sephora's because it was easier to get a hold of and is in a handy dandy spray bottle.

So... Does it really work??
HECK YES!!!!
I am completely and utterly obsessed.  I'm really not quite sure how I ever lived without this stuff and I'm not sure I'll ever wash my brushes with soap and water ever again.. lol
2 sprays is all you need even on larger powder brushes, swirl the brush on a paper towel and it comes clean..
So clean that all of the junk that comes off of it may scare you.
It has a fresh Citrus smell (which I love) and leaves my brushes super duper soft.
This cleaner is quick drying, but does leave your brush a little damp afterward so I wouldn't recommend using it and then going in to do your makeup right away.  
Granted your brushes won't be as clean as if you scrubbed them with soap & water, I've found the foundation brushes are the hardest but it definitely gets majority of my brushes totally clean.
It's great as a spot cleaner in between 'real' washes.
*Demo below cleaning a foundation brush..


Another thing I use this for is to clean my foundation mixing pan.
I have such a hard time cleaning that darn thing with soap & water but just a half spray of this stuff and it wipes clean.

Overall, I definitely recommend this little miracle product.
I think this size bottle would last the average person quite a while.
I haven't even put a dent in mine and am already planning on purchasing back ups.
So go run, don't walk.
You need it.
Right now.
:-)


Til Next Time...
XO,
Terin


Connect With Me:


Get $10 OFF your first order from Dottie Couture Boutique
CLICK HERE


Use code SALTYTERIN10 for 10% OFF your order from Salty Mermaid Swim
CLICK HERE


Use my coupon code TERINTAN20 for 20% off your purchase
of any Million Dollar Tan product(s).
CLICK HERE


Get $5 off your first purchase in the Amazon App with code TERIN4243N


Use Code TERINBROOKE15 for 15% off your purchase of
Elsa and Rose Swimwear
CLICK HERE


Sign up for EBates & receive cash back on
majority of your online purchases.
CLICK HERE


Use code HOKUE at sign up for PoshMark App &
receive a free $10 credit.
CLICK HERE

Sunday, May 1, 2016

Dry Brushing: Benefits & How To

Sephora Dry Revive Dry Body Brush $14.00 -Click Here


Okay, so Dry Brushing is a new addiction of mine.  
I had never heard of it until recently, and it's ridiculously underrated in my opinion.
First of all, I LOVE to exfoliate.  My face, my body, exfoliate it all!
I dry brush everyday before I shower and have definitely noticed positive changes in my skin.
My skin overall feels softer, firmer, and I've noticed cellulite reduction.
So let me give you the 411....

What Is It?
Dry Brushing is the technique of using an abrasive brush to brush your dry skin prior to showering. 
(You want to do it before showering so that you can wash the dry/ dead skin off)
Typically starting at your feet, working upward, and brushing in circular motions.
As you brush, you skin will most likely turn a little red, that's normal and a good sign.
Personally, I need to turn red and/ or it hurt a little to feel like it's doing something.
I'm weird that way.

What Does It Do?
Dry brushing majorly helps your lymphatic system.  It can improve circulation, tighten skin, reduce cellulite, release toxins trapped in the skin, and unclog pores.

What Do I Need?
All you need is a natural (not synthetic) boar bristle brush.  I originally started with one I purchased at Target; however, I felt the bristles weren't abrasive enough.  So I went and got the Dry Revive brush from Sephora and I am OBSESSED.  
I prefer this brush vs others with handles and such because it's super easy to control and fits easily in the palm of your hand.


I hope you all enjoy this post and let me know if you decide to try out Dry Brushing!
As always, feel free to drop me any questions.

Til next time.
XO,
Terin


Connect With Me::


{Discounts}

Use Code TERINBROOKE for 15% off your purchase of
To Die For Swimwear


Use my coupon code TERINTAN20 for 20% off your purchase
of any Million Dollar Tan product(s).


Sign up for EBates & receive cash back on
majority of your online purchases.


Use code HOKUE at sign up for PoshMark App & 
receive a free $10 credit.


Sunday, February 7, 2016

A Night Out | Super Bowl 50🏈 (ft Morphe 35o Palette)


Today I'm going to be sharing the deets for this eye look.  
I kind of just threw this together while I was getting ready today and really love the way it turned out so I wanted to share.  :-) 


I started with my typical routine..  Applied moisturizer, BB cream, concealer, and then set my face.  Ya know, to control my inner grease ball.  

I used the highly sought after Morphe 35o palette and the Sonia Kashuk no. 109  brush.  
The #109 blending brush has legit become a holy grail of mine and I plan on ordering more!! 
(All items used will be detailed below.)
I found tonight that these specific shadows blend muuuuch better with a dense blending brush rather than a shadow or crease brush.  So I used the SK no. 109 with every shadow and blended blended blended so that it didn't become muddy looking.  
Unfortunately, these shadows do not have names, so I have put numbers on the shadows I used and will explain in further detail below when and how I used each one.  


EYES:
These shades are darker in person, I used flash to take this photo.

Starting out I took a little of 1 & 2 on my brush and blended them into my crease and upwards towards my brow bone, blending until it looked smooth.  

Then I went into 3 & 4 softly blending them into my outer V (outer corner) after must was applied I brushed up and across my crease with any excess left on my brush.  

Next taking 5 & 6 I added more into the outer V and into the crease to darken it up a bit more.  I then blended all of the shadows together more by doing windshield wiper motions back and fourth in my crease and along my outer corner.  Afterwards I took a small amount of 7 and blended it all into my crease and my outer corner.  

I never took any of the shadows all over my lid, I feel leaving the lid plain adds a better look and more dimension when the look is finished.  You could even take one of the lighter shades and add it to your lid afterwards if you want.   
(If you feel it isn't as dark as you'd like just keep going back in with the shadows, blending well between each application.)

To finish off I used 8 & 9 to highlight my brow bone and then added some black eyeliner on my bottom lash line & smudged it out with the darker shadows I used from the palette.  

The key with smokey looks and especially these shadows is blend blend blend!!!  
It's taken me a little bit to get the hang of this palette, but I do love it and think it's worth the hype!


FACE

For my contour and blush I used my Benefit Cosmetics Cheekathon Palette.  

I used the brush shown and applied Hoola to the hallows of my cheek bones and temples to add warmth & dimension to my face.  
I really love Hoola.  It's so versatile and I think it is a perfect bronzer for any skin type and for contouring beginners, because it's light and matte..  You don't get a ton of product in 1 swipe so it's easier to build up and harder to accidentally apply too much.  ;-)

For blush I used Dandelion (top left) and then Rockateur (top right) over it.  

Easy peasy!  


Finished Look:


I hope y'all enjoy this little informational demo.  I'm going to list all products used for this look below as well as where they can be found!  ;-)
As always any questions or comments you can drop in the comments or in a private contact form!  
Please also feel free to send me suggestions for what you'd like to see on my blog in the future!!
XO,
Terin

Connect With Me::


Products Mentioned:

Morphe 35o Palette - MorpheBrushes.com 
(It sells out almost immediately every time it's restocked so just keep stalking the site.)

Benefit Cosmetics Cheekathon Palette (I got mine from HSN it was a limited edition exclusive and has sold out; however, you can buy all of the products individually from Ulta.)

Sonia Kashuk no. 109 Blending Brush - Found at Target -   Click Here to view/ order.  


Other Products Used Not Mentioned:

Clinique Dramatically Different Moisturizing Gel 
Garnier BB Cream for Combo to Oily in Light/ Medium 
Real Techniques Complexion Sponge 
Maybelline Master Fix Loose Setting Powder
L'Oreal Voluminous Carbon Black Mascara
Maybelline Volume Express Falsies Push Up Drama (wow that's a mouth full, huh?)
Rimmel London Lip Liner in Eastend Snob
NYX Butter Gloss in E'clair


What I'm Wearing:
Top- Express


{DISCOUNT CODES}

Save 20% on any Million Dollar Tan purchase with code TERINTAN20 - Click Here
**Y'all, PLEASE do not share my affiliate codes to any other sites, specifically coupon sites..  Otherwise I won't be able to share discounts with my readers anymore.. :-( **

Monday, January 11, 2016

DIY | Makeup Brush Holder

So for the past week or so I've been sick with what I was convinced would be the death of me...   Today I am feeling much better and really needed to get out of the house so I figured I'd tackle a little project I have been wanting to do for a while, a DIY makeup brush holder..  
It turned out super cute so I wanted to share my quick & cost effective way to make one.  :-)

What You'll Need:

Feel free to click the pictures if you'd like to see them larger! ;-P

1. A container $2.99 (I got this one at Tj Maxx) 
The container really depends on your style and how much brushes you want to put in it.  These glass ones run a bit pricey at places like Michael's, but are super affordable at Tj Max..  Matter of fact Michael's had the exact same one for like $13.  

2. Filler $4.99/ each  (I got mine at Michael's)
There's a few different options for filler.  Sand, Gems, Marbles, etc..  I opted for these because I figure if they get dirty/ dusty they can be cleaned.  


Next just fill the container up in whichever way you prefer.  (Layered, mixed, whatevs)

The Finished Product...
Super easy & super cute!!

Hope y'all enjoyed!!  Be sure to show me yours if you make one! ;-)

XO, 
Terin

Connect With Me::